
Introduction
Peanut butter cups are a beloved sweet treat, loved for their creamy peanut butter filling encased in chocolate. Translating that classic flavor into a tart form elevates the experience, creating a rich, luscious dessert with a crispy crust, silky filling, and a chocolate topping that mimics the iconic candy. Whether for a special occasion, a party, or a decadent weekend treat, a Peanut Butter Cup Tart can impress any palate.
This comprehensive guide will walk you through every aspect of creating this indulgent dessert, from selecting ingredients to presentation, with tips and tricks along the way. Let’s dive into the world of peanut butter, chocolate, and pastry!
1. Understanding the Components of the Peanut Butter Cup Tart
Before jumping into the recipe, it’s essential to understand the three main components that make up this tart:
A. The Crust
- Purpose: Provides the structural base, adding texture and flavor.
- Common choices: Shortcrust pastry, graham cracker crust, or a cookie crust.
- Considerations: Should be sturdy enough to hold the filling and toppings but tender enough to cut easily.
B. The Peanut Butter Filling
- Purpose: The core flavor; creamy, rich, and reminiscent of peanut butter cups.
- Composition: Usually a mixture of peanut butter, cream, sugar, and stabilizers like gelatin or gelatin substitutes to set the filling.
- Texture: Smooth and silky, holding its shape when sliced.
C. The Chocolate Top Layer
- Purpose: Mimics the chocolate coating of peanut butter cups.
- Options: Melted chocolate, ganache, or tempered chocolate for a glossy finish.
- Additional decoration: Optional toppings like chopped peanuts, sprinkles, or drizzle.
2. Ingredient Selection and Preparation
High-quality ingredients make the biggest difference in flavor and texture. Here are recommended choices:
A. Crust Ingredients
- Butter: Unsalted, cold
- Flour: All-purpose, or specialty flours if desired
- Sugar: Granulated or powdered
- Salt: Enhances flavor
- Optional: Cocoa powder for a chocolate crust, crushed cookies, or graham crackers for a different taste
B. Peanut Butter Filling
- Peanut butter: Use natural or commercial creamy peanut butter (smooth or crunchy as preferred)
- Heavy cream: Provides richness and helps set the filling
- Sweetener: Powdered sugar, honey, or maple syrup
- Flavoring: Vanilla extract
- Stabilizers: Gelatin or gelatin substitutes (agar-agar, if vegan)
- Optional: Cream cheese or mascarpone for added creaminess
C. Chocolate Topping
- Chocolate: Semisweet, bittersweet, or milk chocolate depending on preference
- Cream: Heavy cream for ganache
- Butter: For shine and smoothness (optional)
- Decorative toppings: Chopped peanuts, sprinkles, or edible gold leaf for elegance
3. Equipment Needed
- 9-inch tart pan with removable bottom
- Food processor or blender
- Mixing bowls
- Whisk and spatula
- Double boiler or microwave-safe bowl for melting chocolate
- Baking sheet or tray
- Piping bag or spoon for decorating
- Measuring cups and spoons
- Fine sieve or sifter
- Small saucepan
- Cooling racks
- Knife for slicing
- Pastry brush (for applying glaze or melted chocolate)
4. Step-by-Step Recipe and Techniques
Step 1: Making the Crust
a. Classic Shortcrust or Cookie Crust Method
- Preparation: In a food processor, combine 1 1/4 cups all-purpose flour, 1/4 cup granulated sugar, and a pinch of salt. Pulse to mix evenly.
- Add butter: Cut 1/2 cup (115g) cold unsalted butter into small chunks. Add to processor and pulse until the mixture resembles coarse crumbs.
- Incorporate liquid: Add 1 large egg yolk and 2 tablespoons ice-cold water. Pulse briefly until the dough starts to come together. If necessary, add another tablespoon of water.
- Form the dough: Turn out onto a floured surface, knead gently into a disk, wrap in plastic wrap, and chill for at least 30 minutes. Resting ensures easier rolling and prevents shrinkage.
- Roll out: On a lightly floured surface, roll the dough to about 1/8-inch thickness. Transfer to the tart pan, pressing into corners and trimming excess.
- Chill again: Refrigerate for 15-20 minutes before baking to prevent shrinking.
- Bake: Preheat oven to 375°F (190°C). Line the crust with parchment paper and fill with pie weights or dried beans. Bake for 15 minutes, then remove weights and parchment, baking an additional 10 minutes or until golden. Cool completely.
b. Alternative Crusts:
- Graham cracker crust: Mix crushed graham crackers with melted butter and sugar. Press into tart pan and bake or chill.
- Cookie crust: Use crushed cookies (Oreos, digestive biscuits) mixed with butter.
- No-bake option: Use a mixture of crushed cookies and butter, chilled before filling.
Step 2: Preparing the Peanut Butter Filling
a. Basic Peanut Butter Filling
- Bloom gelatin: If using gelatin, sprinkle 1 teaspoon gelatin powder over 2 tablespoons cold water and let sit for 5 minutes.
- Heat cream: In a small saucepan, warm 1 cup heavy cream until just simmering. Remove from heat.
- Dissolve gelatin: Add bloomed gelatin to warm cream, stirring until dissolved.
- Combine ingredients: In a mixing bowl, blend 1 cup peanut butter (smooth or crunchy), 1/2 cup powdered sugar, 1 teaspoon vanilla extract, and optional cream cheese or mascarpone for extra creaminess.
- Add cream mixture: Pour the warm cream mixture into the peanut butter mixture gradually, stirring until smooth.
- Set the filling: Transfer to a bowl, cover, and refrigerate for at least 2 hours or until firm enough to spread.
b. Vegan or Dairy-Free Alternative
- Use coconut cream, almond butter, and agar-agar as a gelatin substitute.
- Follow similar steps but ensure all ingredients are plant-based.
c. Texture Tips
- For a creamier filling, blend ingredients using an immersion blender or food processor.
- For a firmer filling, increase gelatin or add more cream cheese.
Step 3: Assembling the Tart
- Spread the filling: Once the peanut butter mixture is set and firm, spread it evenly into the cooled tart shell using a spatula or offset knife.
- Chill: Refrigerate the assembled tart for at least 1-2 hours to allow the filling to firm up further.
Step 4: Making the Chocolate Top Layer
a. Classic Ganache
- Chop chocolate: Use about 1 cup (170g) of chopped chocolate.
- Heat cream: In a small saucepan, heat 1/2 cup heavy cream until just boiling.
- Pour over chocolate: Place chopped chocolate in a heatproof bowl, pour hot cream over, and let sit for 2-3 minutes.
- Stir until smooth: Gently stir until ganache is glossy and smooth.
- Optional butter: Add 1 tablespoon unsalted butter for extra shine.
- Cool slightly: Let the ganache cool a bit before pouring.
b. Applying the Topping
- Pour ganache over the chilled peanut butter layer, spreading evenly.
- Use a spatula or tilt the tart to smooth the surface.
- For a decorative touch, pipe rosettes or drizzle melted chocolate in contrasting designs.
c. Alternative Chocolate Toppings
- Melted chocolate spread
- Tempered chocolate for glossy finish
- Chocolate shards or curls for decoration
Step 5: Decorating and Final Touches
- Peanuts: Chopped roasted peanuts sprinkled on top add crunch.
- Chocolate drizzle: Melted white or dark chocolate drizzled across the top.
- Edible gold or silver leaf: For an elegant finish.
- Additional toppings: Mini peanut butter cups, sprinkles, or candy pieces.
Step 6: Chilling and Serving
- Once assembled and decorated, refrigerate the tart for at least 2-4 hours, preferably overnight, to allow flavors to meld and layers to set.
- Before serving, bring to room temperature for optimal flavor and texture.
- Slice with a sharp knife, wiping blades clean between cuts for neat slices.
5. Tips and Tricks
- Temperature control: Keep ingredients cold to prevent melting and ensure clean slicing.
- Layer stability: Ensure each layer is adequately set before adding the next to prevent mixing.
- Chocolate finish: Temper chocolate if you want a shiny, professional appearance.
- Flavor enhancements: Add a pinch of sea salt or cayenne pepper to the peanut butter filling for contrast.
- Garnishes: Use fresh fruit, sprigs of mint, or edible flowers for visual appeal.
6. Variations and Customizations
A. Nut Variations
- Substitute peanut butter with almond, cashew, or hazelnut spread.
- Mix nuts into the crust or sprinkle on top for extra crunch.
B. Dietary Adjustments
- Gluten-free crust options using almond flour or gluten-free cookies.
- Vegan fillings using coconut cream, vegan butter, and plant-based chocolate.
C. Flavor Pairings
- Add a layer of banana slices between the filling and topping.
- Incorporate a splash of bourbon or coffee into the filling for complexity.
- Use flavored chocolates like caramel or dark chocolate with sea salt.
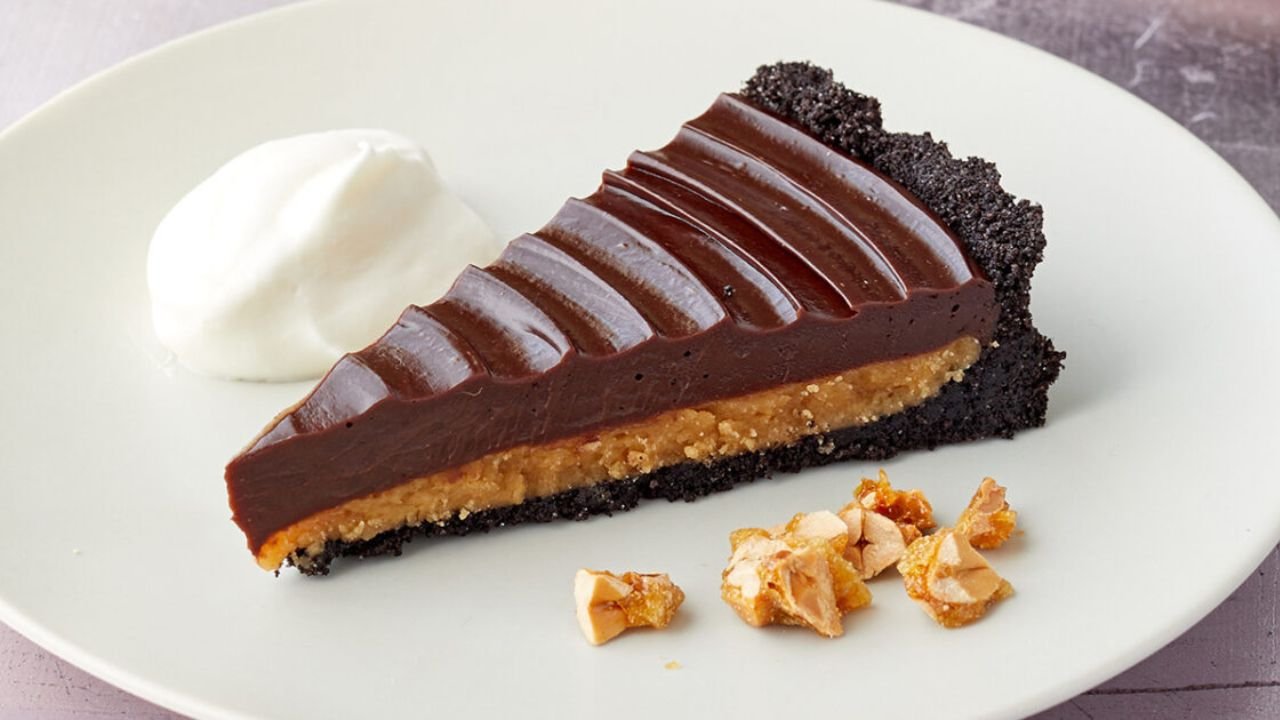
D. Presentation Ideas
- Serve slices on elegant plates with dollops of whipped cream.
- Garnish with colorful fruit patterns or chocolate shavings.
- Create individual tartlets for party servings.
7. Storage and Shelf Life
- Refrigeration: Store in an airtight container in the refrigerator for up to 3-4 days.
- Freezing: Wrap tightly in plastic wrap and foil, then freeze for up to 1 month. Thaw in the refrigerator overnight before serving.
- Tips: The crust may soften over time; serve at room temperature for best texture.
8. Troubleshooting Common Issues
| Issue | Cause | Solution |
|---|---|---|
| Filling not setting | Insufficient gelatin or improper cooling | Increase gelatin quantity or ensure proper chilling |
| Cracks in ganache | Overheating or rapid cooling | Temper chocolate properly; cool ganache slowly |
| Crust too soft | Not baked long enough or too much moisture | Bake thoroughly; avoid overfilling with moist ingredients |
| Topping sliding | Not enough chilling time | Chill tart before pouring ganache or decorating |
9. The History and Cultural Significance of Peanut Butter and Chocolate
While the peanut butter cup as a candy was invented in the early 20th century, the pairing of peanut butter and chocolate has a long-standing appeal rooted in American confectionery. The Reese’s Peanut Butter Cup was introduced in 1928 and became an icon of sweet indulgence.
Translating these flavors into a tart combines the comfort of a classic candy with the elegance of pastry, making it suitable for both casual gatherings and sophisticated dessert tables. This dessert celebrates the harmony of salty, sweet, creamy, and crunchy textures.
10. Final Words and Inspiration
Creating a Peanut Butter Cup Tart is a rewarding culinary project that combines baking, chocolate tempering, and creative decoration. It allows for customization, experimentation with flavors, and presentation finesse. The key is to balance the layers, ensure proper chilling, and use quality ingredients.
Whether you’re a home baker looking to impress guests or a professional pastry chef seeking a show-stopping dessert, this tart can be tailored to your taste and occasion. Its rich, decadent flavor profile will delight peanut butter lovers and chocolate aficionados alike.
Summary of Key Steps:
- Prepare a sturdy, buttery tart crust and bake until golden.
- Make a smooth, settable peanut butter filling with optional stabilizers.
- Chill the filling until firm.
- Cover with a glossy chocolate ganache or melted chocolate.
- Decorate creatively.
- Chill again to set all layers.
- Serve at room temperature for maximum flavor and texture.
Additional Recipes and Ideas
- Mini Peanut Butter Cup Tarts: Use mini tart pans for individual servings.
- Vegan or Gluten-Free Versions: Adapt ingredients as needed.
- Add-ins: Swirl in caramel or incorporate banana slices for extra flavor.
Final Tips for Success
- Use high-quality chocolate for a glossy, professional finish.
- Don’t rush the chilling steps; patience ensures better texture.
- Experiment with flavorings like sea salt, espresso powder, or spices to personalize your tart.
- Presentation is key—use contrasting colors and garnishes for visual appeal.
Closing Remarks
Making your own Peanut Butter Cup Tart is both an art and a science. It involves precise technique, patience, and creativity. The result is a luscious, indulgent dessert that captures the essence of the beloved candy in a sophisticated pastry form. Enjoy the process, and most importantly, indulge in every bite!