
Introduction
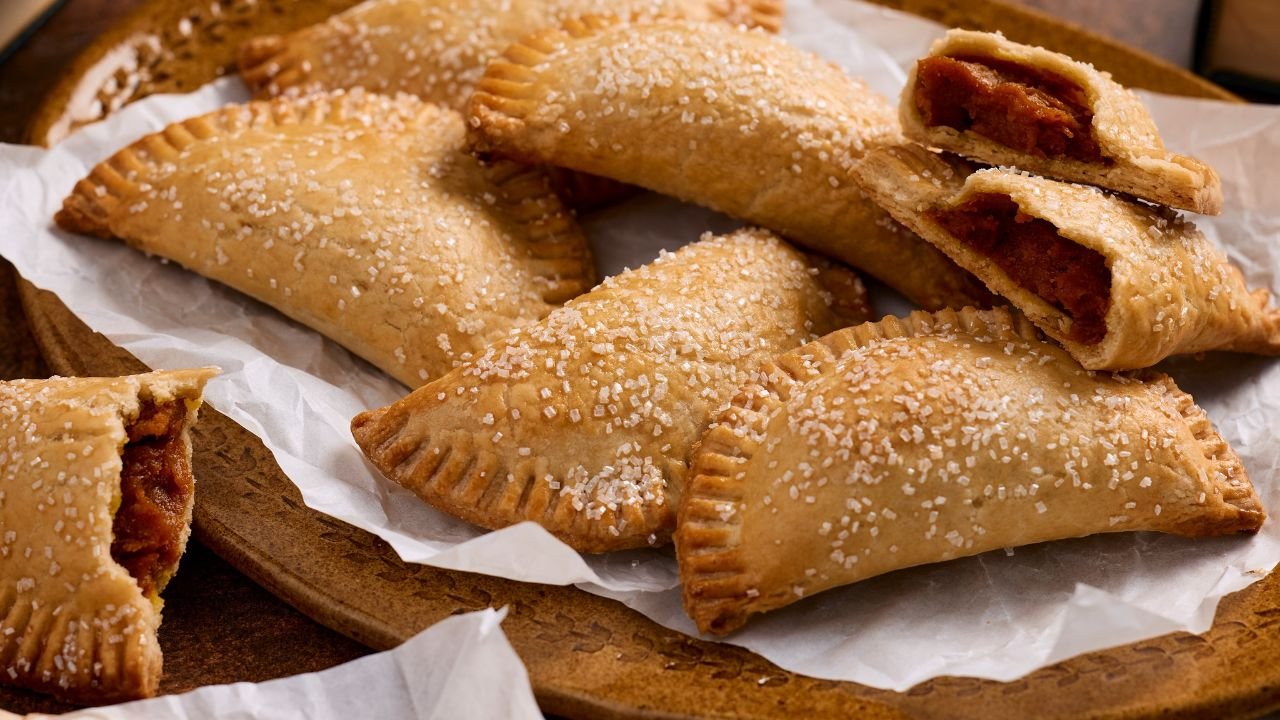
Pumpkin Hand Pies are a cozy, portable dessert that combines the comforting flavors of pumpkin spice filling with flaky, tender pastry. Perfect for fall gatherings, holiday celebrations, or just a warm treat on a chilly day, these hand pies are a delightful way to enjoy pumpkin in a handheld form.
Unlike traditional pumpkin pie served in slices, these individual pies are easy to eat on the go, make great party favors, and can be customized with various fillings and toppings. Whether you’re a seasoned baker or trying your hand at pastry for the first time, this comprehensive guide will walk you through every step of creating perfect Pumpkin Hand Pies.
1. Understanding the Components of Pumpkin Hand Pies
A successful pumpkin hand pie combines a flaky, buttery crust with a rich, spiced pumpkin filling. The key components include:
A. Pastry Crust
- Type: Usually a flaky pie dough or pâte brisée.
- Role: Provides structure and a tender, crisp texture.
- Considerations: Should be easy to handle and roll, yet sturdy enough to hold the filling.
B. Pumpkin Filling
- Ingredients: Pumpkin puree, sugar, spices, and often a binder like egg or cream.
- Flavor profile: Warm spices (cinnamon, nutmeg, ginger), sweetness, and pumpkin’s earthy flavor.
- Consistency: Thick enough to hold shape but soft and moist.
C. Egg Wash and Toppings
- Egg wash: For a shiny, golden finish.
- Optional toppings: Sugar crystals, streusel toppings, or drizzles of icing.
2. Selecting Ingredients
High-quality ingredients elevate your hand pies. Here’s what you’ll need:
A. For the Pastry Dough:
- Flour: All-purpose flour is standard.
- Butter: Unsalted, cold. Preferably European-style for richness.
- Ice water: To bring the dough together.
- Salt: Enhances flavor.
- Optional: A touch of sugar for a slightly sweet crust.
B. For the Pumpkin Filling:
- Pumpkin puree: Canned or homemade. Use pure pumpkin, not pie filling.
- Sugar: Granulated or brown sugar, depending on preference.
- Spices: Ground cinnamon, nutmeg, ginger, cloves.
- Egg: To bind the filling and create richness.
- Cream or milk: Optional, for a creamier filling.
- Vanilla extract: Adds depth.
C. For Finishing:
- Egg wash: Beaten egg or egg mixed with a teaspoon of water or milk.
- Sugar: Granulated or coarse sugar for sprinkling.
- Optional: Powdered sugar for dusting or icing for drizzle.
3. Equipment Needed
- Rolling pin
- Round cutter or cup (about 3-4 inches diameter)
- Baking sheet
- Parchment paper or silicone baking mat
- Pastry brush
- Mixing bowls
- Whisk or fork
- Fork for sealing edges
- Sharp knife or pizza cutter
- Cooling rack
4. Preparing the Pastry Dough
A. Making the Dough
- Combine dry ingredients: In a large bowl, whisk together 2 1/2 cups all-purpose flour, 1 teaspoon salt, and 1 tablespoon sugar if using.
- Cut in the butter: Add 1 cup cold, cubed unsalted butter. Use a pastry cutter, two forks, or your fingers to cut the butter into the flour until the mixture resembles coarse crumbs with some pea-sized pieces.
- Add ice water: Drizzle in 4-6 tablespoons ice water, one tablespoon at a time, mixing gently with a fork or spatula. Add just enough for the dough to come together when pressed.
- Form a dough: Turn the mixture onto a floured surface and knead gently into a disc. Avoid overworking to keep the pastry tender.
- Chill: Wrap the dough in plastic wrap and refrigerate for at least 1 hour or up to 24 hours. Chilling relaxes gluten, prevents shrinking, and makes the dough easier to roll.
B. Handling the Dough
- Before rolling, let the dough sit at room temperature for 5-10 minutes.
- Lightly flour the rolling surface and rolling pin to prevent sticking.
- Roll into a 1/8-inch thick sheet, flipping and dusting with flour as needed.
5. Making the Pumpkin Filling
A. Classic Pumpkin Filling Recipe
- Combine ingredients: In a bowl, whisk together:
- 1 cup pumpkin puree
- 1/2 cup granulated sugar
- 1 large egg
- 1/4 cup heavy cream or milk
- 1 teaspoon vanilla extract
- 1 teaspoon ground cinnamon
- 1/4 teaspoon ground nutmeg
- 1/4 teaspoon ground ginger
- Pinch of ground cloves (optional)
- Adjust sweetness: Taste the mixture and add more sugar if needed.
- Thicken the filling: The egg and cream help the filling set during baking.
B. Variations and Add-ins
- Add a tablespoon of molasses or maple syrup for deeper flavor.
- Include a pinch of cayenne pepper for a subtle heat.
- Use brown sugar instead of white for richer flavor.
- Mix in chopped nuts or dried cranberries for texture.
6. Assembling the Hand Pies
A. Cutting the Dough
- Remove the dough from the refrigerator and roll out to about 1/8-inch thickness.
- Use a round cutter or a cup (about 3-4 inches diameter) to cut out circles.
- Gather scraps, reroll, and cut additional rounds.
B. Filling and Sealing
- Place a small spoonful (about 1-2 teaspoons) of pumpkin filling in the center of each dough circle.
- Be careful not to overfill to prevent spilling.
- Brush the edges of the dough with a little water or egg wash to help seal.
- Fold the dough over the filling to create a half-moon shape.
- Press the edges together firmly, then crimp with a fork for a decorative seal and to prevent leakage.
C. Optional: Decorative Edges and Designs
- Use cookie cutters or stamps to add designs to the tops.
- Cut small vents or slits to allow steam to escape during baking.
- For a more rustic look, leave the edges uncrimped.
7. Baking the Hand Pies
A. Preparing for Baking
- Preheat oven to 375°F (190°C).
- Line baking sheets with parchment paper or silicone baking mats.
- Place assembled pies on the prepared baking sheet, spacing about 1-2 inches apart.
B. Applying Egg Wash and Toppings
- Lightly brush the tops of the pies with beaten egg for a shiny, golden finish.
- Sprinkle with coarse sugar, cinnamon sugar, or decorating sugar if desired.
C. Baking
- Bake for 20-25 minutes, or until the pies are golden brown.
- Rotate the baking sheet halfway through for even baking.
- Keep an eye on the pies to prevent over-browning.
D. Cooling
- Remove from oven and let cool on a wire rack for at least 10 minutes before serving.
- Cooling helps the filling set further and makes handling easier.
8. Variations and Flavor Twists
A. Alternative Fillings
- Sweet Potato: Substitute pumpkin with mashed sweet potato, flavored with similar spices.
- Apple Cinnamon: Use cooked apples with cinnamon and sugar.
- Cherry or Cranberry: Add fruit preserves or fresh tart berries.
- Cream Cheese and Pumpkin: Mix softened cream cheese into the filling for extra richness.
B. Pastry Variations
- Use puff pastry for a flakier, more delicate crust.
- Incorporate a crumb topping or streusel for added texture.
- Make gluten-free crusts using almond flour or gluten-free flour blends.
C. Toppings and Decorations
- Drizzle with icing or glaze.
- Dust with powdered sugar before serving.
- Add decorative cutouts on top of the pies before baking.
9. Presentation and Serving Suggestions
- Serve warm or at room temperature.
- Top with whipped cream, caramel sauce, or a dusting of cinnamon.
- Pair with vanilla ice cream or spiced whipped cream.
- Pack in festive boxes or wrap individually for gifts or parties.
10. Storage and Shelf Life
A. Short-term Storage
- Store cooled pies in an airtight container at room temperature for up to 2 days.
- For longer storage, refrigerate for up to 4 days.
B. Freezing
- Freeze unbaked or baked pies for later.
- To freeze unbaked, arrange on a baking sheet, freeze until firm, then transfer to a zip-top bag or container.
- Bake directly from frozen, adding a few extra minutes.
- To freeze baked pies, cool completely, wrap tightly in plastic wrap and foil, and freeze for up to 1 month.
- Reheat in the oven at 350°F (175°C) until warmed through.
C. Reheating
- Reheat baked pies in the oven at 350°F for 10-15 minutes.
- For quick warming, microwave for 20-30 seconds per pie.
11. Troubleshooting Common Issues
| Issue | Cause | Solution |
|---|---|---|
| Filling leaking during baking | Overfilling or insufficient sealing | Use less filling; press edges firmly and crimp well |
| Pastry too tough or crumbly | Overworking dough or too much flour | Handle minimally; keep dough cold; use minimal flour when rolling |
| Pies not browning evenly | Oven temperature too low or uneven heat | Check oven calibration; rotate baking sheets during baking |
| Dough shrinking or puffing | Too much handling or improper chilling | Chill dough thoroughly; handle gently |
12. Tips for Perfect Pumpkin Hand Pies
- Use cold ingredients: Keep butter and water cold to ensure flaky crusts.
- Do not overmix: Overworking dough develops gluten, leading to tough pastry.
- Chill thoroughly: Resting dough prevents shrinkage and makes rolling easier.
- Seal well: Proper sealing prevents filling leaks.
- Vent when needed: Small slits allow steam to escape, preventing puffing or bursting.
- Customize spices: Adjust spice levels to taste; experiment with nutmeg, allspice, or cardamom.
- Make ahead: Prepare the filling and dough in advance; assemble just before baking.
13. A Brief History of Pumpkin Desserts
Pumpkin has been a staple in North American cuisine for centuries, especially in fall and harvest celebrations. Classic pumpkin pie became popular in the 19th century, symbolizing Thanksgiving traditions. The idea of portable pumpkin treats like hand pies emerged as a way to enjoy the flavor on the go, combining pastry techniques with seasonal ingredients.
Today, pumpkin hand pies are a modern twist on traditional desserts, combining rustic charm with convenience. They are part of the broader trend of handheld desserts, which include turnovers, empanadas, and calzones, all of which highlight the versatility of pastry dough and seasonal fillings.
14. Final Thoughts and Creative Ideas
Making pumpkin hand pies is an enjoyable baking project that combines the warmth of fall flavors with the satisfying crunch of flaky pastry. With the right ingredients, patience, and a bit of creativity, you can craft beautiful, delicious pies perfect for sharing.
Creative Variations:
- Add a cream cheese swirl on top of the filling before sealing.
- Incorporate chopped nuts into the filling for added crunch.
- Use flavored sugars or toppings like cinnamon sugar or toasted coconut.
- Create mini pies using smaller cutters for party favors or sampling.
Presentation Tips:
- Serve on a rustic platter dusted with powdered sugar.
- Garnish with a sprig of fresh mint or a drizzle of caramel.
- Pack in festive boxes with personalized tags for gifts.
Conclusion
Pumpkin Hand Pies are a wonderful way to celebrate the flavors of fall and winter holidays. Their combination of flaky crust and spiced pumpkin filling makes them a crowd-pleaser. Whether enjoyed warm with a dollop of whipped cream or as a portable snack, they bring comfort and joy to any table.
Armed with this comprehensive guide, you now have the knowledge and confidence to bake perfect pumpkin hand pies that will impress family and friends alike. Happy baking!