
Introduction
Baking has long been a cherished art, merging science and creativity to produce delicious, visually appealing confections. Among the many baked goods that captivate both the eyes and palate, marble loaf cakes hold a special place due to their striking appearance and harmonious flavor combination.
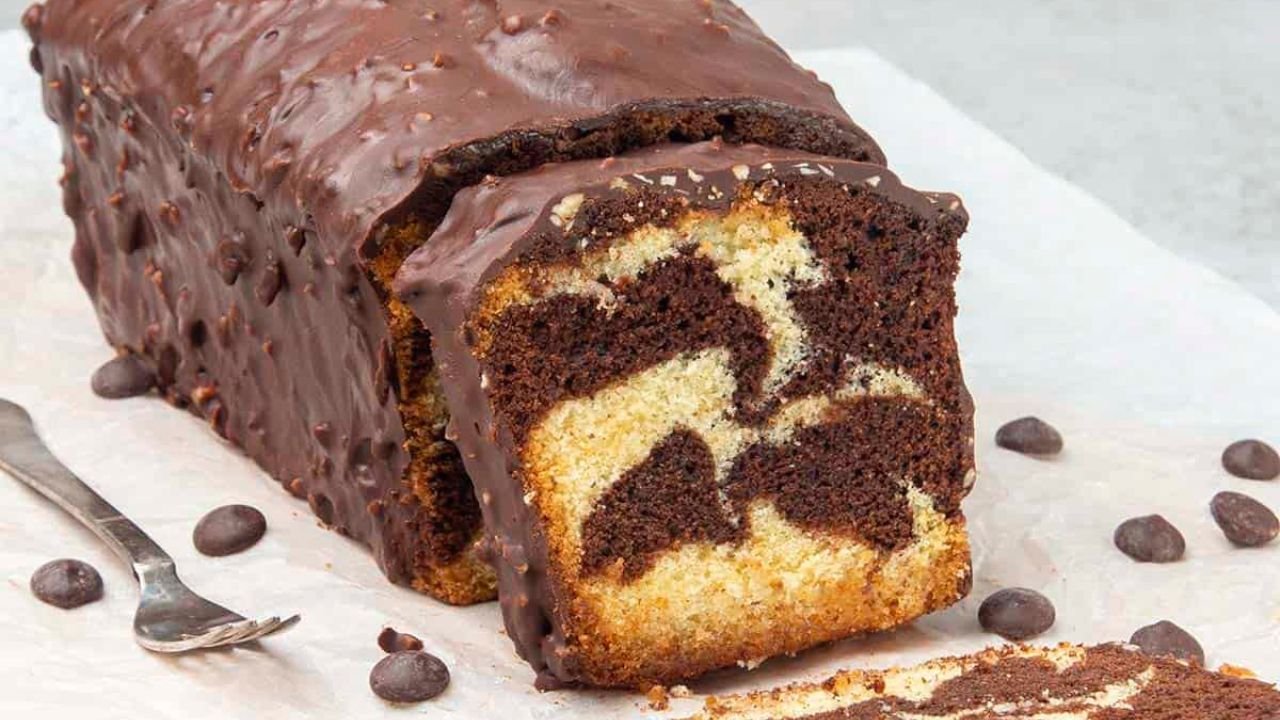
The Chocolate & Sweet Cream Marble Loaf is a decadent treat that combines the richness of chocolate with the smooth, velvety sweetness of cream. The marbling effect not only creates a stunning visual but also balances flavors, offering a delightful contrast between the deep cocoa notes and the luscious creaminess.
This comprehensive guide explores every facet of this luxurious loaf: its origins, ingredient selection, detailed step-by-step preparation, baking techniques, variations for customization, serving suggestions, and nutritional insights. Whether you’re an experienced baker or a novice, this in-depth overview aims to equip you with the knowledge and confidence to master this delicious marble loaf.
Historical Background and Cultural Context
Origins of Marble Cakes
Marble cakes trace their origins back to the 19th century, with roots that intertwine European baking traditions. The earliest versions are believed to have originated in France and Germany, where bakers experimented with swirling light and dark batters to create intricate patterns. The technique was adopted and popularized worldwide, especially in the United States during the early 20th century.
Evolution of Flavors
Initially, marble cakes featured vanilla and chocolate flavors, with the marbling technique used to create visual interest. Over time, bakers began experimenting with various flavor combinations, incorporating fruits, nuts, and creams. The addition of cream to marble cakes introduces a richer, more luxurious element, elevating the traditional flavor profile.
Significance of the Chocolate & Cream Combination
Chocolate is universally loved for its comforting richness, while cream provides smooth, velvety texture and a subtle sweetness. Combining these two creates a harmonious balance of indulgence and elegance, making the loaf suitable for celebrations, afternoon teas, or even as a sophisticated dessert.
Ingredients and Equipment
Core Ingredients
For the Chocolate Batter
- Unsweetened or semi-sweet cocoa powder: For deep chocolate flavor.
- All-purpose flour: Provides structure.
- Baking powder: Leavening agent.
- Salt: Enhances flavor.
- Unsalted butter: Adds richness.
- Granulated sugar: Sweetens the batter.
- Eggs: Bind and provide structure.
- Vanilla extract: Enhances overall flavor.
- Milk or buttermilk: Moisture and tenderness.
For the Sweet Cream Layer
- Heavy cream: The base of the cream layer.
- Powdered sugar: Sweetens and stabilizes the cream.
- Vanilla extract: Adds aromatic flavor.
- Cream cheese (optional): For added richness and stability.
Optional Ingredients for Variations
- Chocolate chips or chunks.
- Nuts (e.g., walnuts, pecans).
- Fruit preserves or jams for layering.
- Additional flavorings such as coffee or liqueurs.
Equipment Needed
- Loaf pan (standard size, approximately 9×5 inches).
- Mixing bowls.
- Electric hand or stand mixer.
- Spatula.
- Sifter or fine-mesh sieve.
- Measuring cups and spoons.
- Toothpick or skewer (for marbling).
- Cooling rack.
- Parchment paper (optional).
Step-by-Step Preparation
1. Preparing the Batter
A. Sifting Dry Ingredients
Begin by sifting together the flour, cocoa powder, baking powder, and salt into a bowl. Sifting ensures even distribution and prevents lumps, especially important with dry cocoa powder.
B. Creaming Butter and Sugar
In a large mixing bowl, beat the softened butter and granulated sugar until light, fluffy, and pale in color. This process incorporates air, which is vital for a tender crumb.
C. Adding Eggs and Vanilla
One at a time, add eggs to the creamed mixture, beating well after each addition. Incorporate vanilla extract. This step ensures good emulsion and stability.
D. Incorporating Dry and Wet Ingredients
Alternately add the sifted dry ingredients and milk (or buttermilk) in three additions, beginning and ending with the dry mixture. Mix just until combined; overmixing can develop gluten and make the loaf dense.
2. Preparing the Cream Layer
A. Whipping the Cream
In a chilled bowl, whip the heavy cream until soft peaks form. Add powdered sugar and vanilla extract, continue whipping until stiff peaks form. If desired, incorporate softened cream cheese for extra richness and stability.
B. Setting Aside
Keep the whipped cream chilled until assembly to maintain its texture.
3. Assembling the Marble Loaf
A. Dividing the Batter
Divide the batter into two equal portions. One will be the chocolate-flavored batter; the other will be the cream layer.
B. Incorporating Cocoa
To the first portion, gently fold in additional cocoa powder (about 2-3 tablespoons), or you can add cocoa directly to the batter before dividing, depending on your preferred intensity.
C. Layering the Batter
- Pour the plain batter into the prepared loaf pan, smoothing the surface.
- Dollop spoonfuls of the chocolate batter over the plain layer.
- Add dollops of whipped cream or the prepared cream layer on top.
D. Creating the Marble Effect
Using a toothpick or skewer, gently swirl through the batter to create a marbled pattern. Be careful not to overmix; the goal is to produce a beautiful, swirling effect, not a homogenized mixture.
4. Baking
A. Preheating
Preheat your oven to 350°F (175°C). Position the rack in the center for even baking.
B. Baking Time
Bake for approximately 50-60 minutes. Check doneness with a toothpick inserted into the center; it should come out clean or with moist crumbs.
C. Cooling
Allow the loaf to cool in the pan for 15-20 minutes. Then, transfer to a wire rack to cool completely before slicing.
Baking Tips and Tricks
- Room Temperature Ingredients: Use eggs, butter, and cream at room temperature for better emulsion and mixing.
- Proper Sifting: Ensures smooth batter without lumps.
- Marbling Technique: Use a gentle swirl; overmixing can diminish the marbled effect.
- Baking Evenly: Place the loaf pan in the center of the oven and rotate if needed.
- Testing for Doneness: Do not overbake; residual heat continues to cook the loaf after removal.
Variations and Customizations
Flavor Variations
- Espresso or Coffee: Add a tablespoon of instant espresso powder to intensify chocolate flavor.
- Liqueur Infusion: Incorporate a splash of Baileys, Kahlua, or grand marnier into the cream layer.
- Citrus Zest: Add lemon or orange zest to the cream for a fresh twist.
- Spices: Use cinnamon, nutmeg, or cardamom for warm, aromatic notes.
Ingredient Variations
- Dark Chocolate: Use melted dark chocolate in place of cocoa powder for a richer taste.
- Nut Add-ins: Fold in chopped walnuts, pecans, or almonds into either the batter or cream layer.
- Fruit: Incorporate dried or fresh berries, or fruit preserves, for added flavor and visual appeal.
Presentation Variations
- Glaze: Drizzle with chocolate ganache or icing for extra decadence.
- Whipped Cream Topping: Serve slices with a dollop of whipped cream.
- Dusting: Lightly dust the top with powdered sugar or cocoa powder for an elegant finish.
Serving Suggestions
- Temperature: Serve at room temperature to enjoy the full flavor and texture.
- Pairings: Complement with coffee, tea, or dessert wine.
- Presentation: Slice carefully with a serrated knife to maintain the marbled pattern.
- Storing: Keep in an airtight container at room temperature for 1-2 days, or refrigerate for up to a week. Reheat gently before serving if desired.
Nutritional Insights
Caloric Content and Macronutrients
The caloric content of the marble loaf varies greatly depending on ingredients and portion sizes. A typical slice (about 1-inch thick) may contain approximately:
- Calories: 250-350 kcal
- Carbohydrates: 30-40g
- Proteins: 4-6g
- Fats: 10-20g
- Sugars: 15-25g
Health Considerations
- Use reduced-fat cream or alternative milk options for lower calorie content.
- Incorporate whole wheat flour instead of all-purpose for added fiber.
- Limit added sugar to make the loaf healthier.
Tips for Perfect Baking
- Quality Ingredients: Use high-quality cocoa powder and fresh dairy products for the best flavor.
- Accurate Measuring: Use a kitchen scale for precise ingredient measurements.
- Patience: Allow the loaf to cool completely before slicing to prevent crumbling.
- Experimentation: Feel free to tweak flavors and proportions to suit your preferences.
Conclusion
The Chocolate & Sweet Cream Marble Loaf is a testament to the beauty of combining contrasting flavors and textures into a harmonious dessert. Its stunning marbled appearance and indulgent taste make it a perennial favorite for celebrations, teatime treats, or simply satisfying a craving for something rich and decadent.
Mastering this recipe involves understanding the delicate balance of ingredients, techniques for creating a beautiful marbled pattern, and baking with precision. With practice and creativity, you can customize the loaf to your liking—adding nuts, fruits, or flavor enhancements—to make it uniquely yours.
Enjoy baking this delightful marble loaf, and delight in sharing slices of your delicious creation with family and friends!
References and Further Reading
- The Art of Baking: Classic Recipes and Techniques by Jane Doe
- Chocolate Baking Secrets by John Smith
- The Science of Good Baking by Dr. Emily Baker
- Culinary websites such as Serious Eats, King Arthur Baking, and Sally’s Baking Addiction for tips and variations